Friday, August 29, 2014

By The Sea Collection Folio


Hi everyone!
I'm back to share a super fun project using Tim's Collections Folio and Compass Blueprint stamps and framelits. I received the stamp and framelits set as my prize for being a winner (in June) of Tim's 12 Tags of 2014 which makes it extra special to me. All participants of CC3C are working from Tim's Compendium of Curiosities 3 book and are asked not to share the techniques out of respect for Tim. I can share my process with you so here goes. 

  Header
Purchase your own autographed copy of CC3 here!

I love the By The Sea collection by Graphic 45 and used it exclusively to decorate my folio.
You can see the stamp and framelits set on my front cover.

I die cut the layers and popped them up with foam tape.

I stamped the compass image on ivory cardstock and colored it with Distress Markers. Then I went over the entire image with walnut stain distress ink to age it.

This is the "spine" of the folio and it has three tabs but I wanted more so I folded it to get six instead. I secured it with double stick tape and covered the edges with paper.

This is how it looks when you open it, there are two flaps that fold out and both are decorated with paper and I added a strip of paper across so I could slide in journaling tabs from the same collection. On the left page I fussy cut a mermaid and sailboat and I used borders to create a pocket. The tag is a #8 manila tag by Ranger and I covered both sides with paper and added two Idea-ology tickets held in place by a mini clip. 

The papers in this collection are SO pretty!
I'm rushed for time so I don't have close ups of the tags/pages I created for the center page but hopefully I can edit this and add some over the weekend. 

Another fun border was added to the flap.


Inspiration Emporium
iegc50
One lucky winner will receive this fantastic prize!


I'm off to get this linked up before I miss the challenge altogether. It's been a crazy week but those of us in the US are about to get a nice break with a three day weekend. I certainly hope everyone enjoys their holiday and stays safe. Also, I want to thank the Curiosity Crew for choosing my Faded Layers card as the winner of challenge #8. What a thrill! 

Thanks for looking today!
Lisa xx

Thursday, August 28, 2014

12 Tags of 2014-August


Welcome!
I'm here to share my August tag and for those who play along with this challenge you'll notice that my tag is heavily influenced by Tim's tag. It's suppose to right? Well this month he gave us the option to showcase our creative muse. I thought about it but honestly loved the masculine feel of his tag and the fact that it would seriously move me out of my comfort zone. How? Sewing, one of my greatest fears. Seriously!


I began by following in his steps and discovered another great use for sketch tape. :)

I went with his color choices and love how they turned out. 
(Note: I didn't use the Ranger texture paste because I already had some. After making this tag it's on my shopping list because this brand did not fully absorb the color. Grrr... Gotta love Ranger products!)

Here's the point where I totally moved OUT of my COMFORT ZONE!
As my regular readers know I am not one to sew on my crafty projects. I love the look but sewing terrifies me and I find it tedious BUT leave it to Mr. Holtz to motivate me to actually sew. :)

A confession-I purchased this adorable mini sewing machine in March of 2012 and this is the FIRST time I have used it. So much for the warranty lol! BTW, I love it!!!

Straight stitches hold my filmstrip piece in place and you can see the speckled dots underneath.

Well here is where I had to "embrace imperfection" because my bottom zig zag stitch is pretty pathetic but at least I gave it a try. Practice makes perfect. ;)

I love this guy, he's just so distinguished!

A lot of Idea-ology products were used on this tag. :)

To keep my word band in place I added a strip of double stick tape.

I used evergreen bough and black soot to make the words stand out then secured it with natural jute string. 


Okay, I'm off to finish another project that is inspired by Tim for the current CC3C and it ends tomorrow so I better get moving. 

Have a great day everyone!
Lisa xx 

Tuesday, August 26, 2014

Address Book

Front

Back

Welcome!
I'm back to share the Address Book I created using cutting files from the Planner Set at The Cutting Cafe. I used the same paper collection, Bohemian Bazaar by Graphic 45, that I used for the 2015 Planner for my DIL. I thought she might like a matching address book. :) 

Here are a few photos for you...

I included the personal info page and stamped a floral image on the back of a calendar page. 
(decided to leave it uncolored in case she wants to color it)

also included the special dates pages for quick reference for b'days, anniversaries, etc.

This is how each contact sheet is formatted in the file and I placed them back to back to be able to view them like this.

close up of the tabs which also are in the file

another fab G45 paper and the 2015 calendar

I fussy cut flowers from the G45 collection and used 2 Recollections yellow paper roses as well. More paper was cut and placed under the fabric thicker alpha's which I altered with mustard seed distress ink and turquoise Stickles. I randomly added some distress ink on the base paper as well. 


So far I've shared two planners and an address book using the files in the Planner Set cutting file. It is an extensive set as you can see below and I'll be back with my third (and final) planner next Tuesday. The others will have to wait until after Christmas to be revealed as they're earmarked for Christmas gifts and the recipients read my blog. :)


The Cutting Cafe


NOTE: This file does NOT require the use of an electronic cutting tool. You can print it in PDF and easily cut by hand. In fact, Regina offers all of her cutting files with the option to print in PDF form and cut by hand. I edited this post because some are under the impression that it requires a cutting machine and it does not. I used a paper trimmer to cut the sheets apart as well as the tabs. 
Hope this encourages you to go forward with this fun project!

TCC Planner Set
The set comes in black and white and color.
The set comes with the following planner pages:
6 ASSORTED COVERS
MY DOODLES
DAILY SCHEDULE - TO DO LIST - APPOINTMENTS - NOTES - WHATS FOR DINNER
2015 YEAR CALENDAR
MONTH CALENDARS - yr 2015
DAY PLANNER - yr 2015
WEEKLY MENU PLANNER
SHOPPING LIST
CONTACTS
PERSONAL INFORMATION
IMPORTANT NUMBERS
SPECIAL DATES
MONTHLY GOALS
RANDOM THOUGHTS
NOTES
TO DO LIST
36 TITLE TABS - 1 BLANK ONE (THIS PAGE ALSO COMES IN JPEG FORMAT)
1 HOLE GUIDE for placement of pages when making a book
8 TAB PAGES - these templates come in pdf, wpc, mtc AND svg formats


See why I think this cutting file is fabulous!!! Click the link in the beginning of this post to purchase the file and start making your own planners.

Have fun!

Lisa xx


Monday, August 25, 2014

A Blog Hop With a Difference and a Bohemian Bazaar Planner

Front Cover
(I added a Prima wood clock, Donna Downey poppy, Tim Holtz alpha's and Webster's Pages trim)

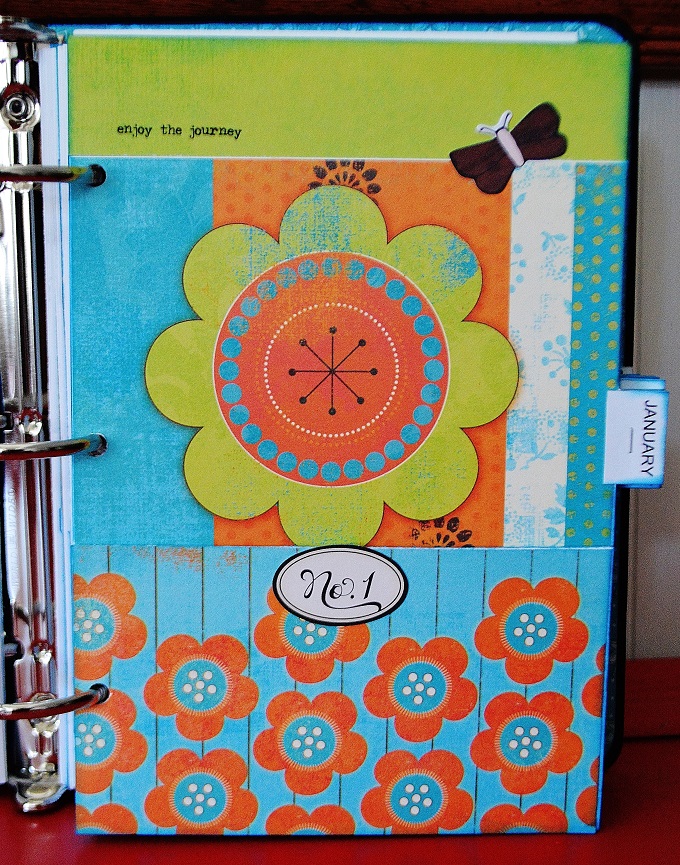
Front and Back Cover

Back Cover


Welcome!!!
As promised I'm back with my second planner using The Cutting Cafe's Planner Set and I'm also participating in The Blog Hop With a Difference. The talented Regina Easter, owner/designer of The Cutting Cafe, asked me a few weeks ago to participate and I was happy to. She is a very talented and generous lady and I'm having the time of my life as a new member of her design team. Be sure to check out the amazing cutting files, templates and printable stamps she offers. :) 

Participants are asked to answer a few questions about our creative styles...

1. What am I working on? Planners, lots of them. When the first one posted a week ago I received several texts/calls/requests so guess what everyone is getting for Christmas lol. Also, have several Tim Holtz inspired projects going on with holiday themes and I'm playing catch up on my Document Life Planner pages. It has been a busy summer!!!

2. How does my work differ from others of its genre? This is hard to answer because I don't think I have a genre. Variety is the spice of life and I like all sorts of crafting styles. ;)

3. Why do I write/create what I do? The majority of what I make is given away to those I love or to charities/organizations. I do it because it gives me pleasure and I've also found crafting to be very therapeutic, especially the past year and a half. My hubby and I lost 3 parents within 11 months and it was rough, crafting kept my sanity intact and helped me work through the grieving process in a positive way.  

4. How does your writing/creating process work? While I'd like to say that I am a neat and tidy crafter that would be a lie. I've tried to be neat but it actually shuts me down creatively. I drag everything out and usually end up with piles on either side of my desk. As for planning, not too much. I'm a "fly by the seat of my pants" kind of gal and let spontaneity take me where it goes.

Now it's my turn to ask two ladies to join in this fun blog hop and I've nominated Shirley-Anne of  Stamping For Joy who will be sharing a post with you next Monday and Asia King of Under a Creative Spell who posted here last Monday. It's a bit out of order I know but we both contacted each other asking the other to participate and this is how it worked out. Be sure to pay both of these incredible ladies a visit and have a look around their blogs to take in all of their crafty talent. 

Are you ready for more pictures of my planner? 
Here ya go... 

I used a 2" 3-ring binder for this planner as well. 

Inside Front Cover with a pocket for "stuff"
(I used G45's Bohemian Bazaar paper collection for the outside and inside covers)

Inside view of my planner featuring 1 of the 6 Assorted Cover pages offered in the file.

Inside back cover

close up of the Assorted Cover page
(I added a strip of G45 paper to the bottom and cut outs)

Regina includes tabs for each organization category.

Personal Info and Important Numbers pages
(I formatted this planner a bit differently. I used double stick tape to adhere sheets together so they would face each other and you'll see this throughout. Note: punch your pages first then place your tape.)

Special Dates pages to record special occasions.

Love that you can see the entire month at a glance and the section for Notes.

This is a pocket page that is in the Planner Set file. I dressed it up with dp's by MME, added some cut outs and remnant rub ons by Tim Holtz.

More cut outs and MME paper.

same here

and here

added a brad to this journaling tab so it swivels

more cut outs and the fancy blue/white trim is by Webster's Pages

another remnant rub on

I picked up this small SMASH pocket at Michaels and added a remnant rub on to the bottom of it.

September is the birth month of my son and DIL plus their anniversary is on the 29th. Since this planner is for them I thought they'd like to have some photo frames for the pictures they'll take on their annual birthday/anniversary trip. I added remnant rub ons to the frames and below the camera for fun and that's a Kaisercraft sentiment rub on at the top. 

more cut outs and MME paper

the bird and the saying are both remnant rub ons, added a journaling cut out to the pocket

more remnant rub ons and a cut out jar 


I originally planned to share additional organizers from the Planner Set file in this post but since this post is so long I think I'll share the address book tomorrow and the Menu Planner within the week. My third planner will debut the 2nd of September and it's my personal planner so I'm eager to share it with you. 

Thanks for your visit today and I hope you're encouraged to give the Planner Set a try!
I also want to thank Regina for asking me to participate in the blog hop!!

See you tomorrow!
Lisa xx


Related Posts Plugin for WordPress, Blogger...